|
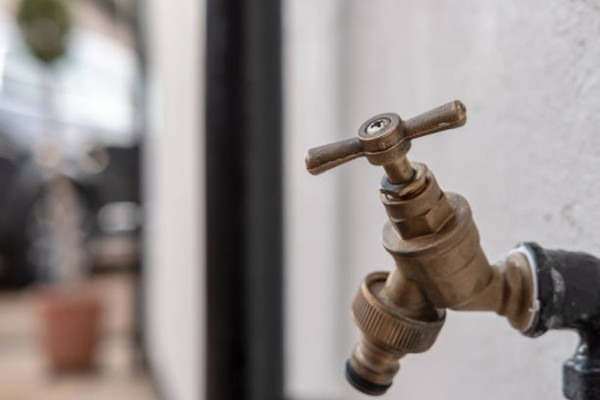
If you've ever had trouble removing a frost free sillcock outside faucet, you're not alone. These faucets can be tricky to remove and can often cause damage if not handled correctly. In this article, we'll discuss you how to remove a frost-free sillcock outside faucet safely and easily. We'll also provide some tips on how to prevent them from freezing in the first place. What Is A Frost Free Sillcock Outdoor Faucet?A frost free sillcock outdoor faucet is a style of faucet that uses a metal spring to move the water flow. These types of faucets are often found on deck or patio areas, and they are very easy to use. Just pull out the spray arm to get started, and then push it back in to stop the flow. Step To Remove a Frost Free Sillcock Outdoor FaucetIf you want to remove your frost-free sillcock outside faucet, follow the following steps: Clear the Area around the FaucetClear away any objects or debris that might be in the way of removing your frost free sillcock outdoor faucet before you begin. This will help prevent any accidents and make the process easier. Use a Wrench to Remove the Retaining ScrewsTo remove the screws that hold the frost-free sillcock outdoor faucet in place, use a wrench. Be careful not to damage the threads on the side of the water valve when doing this – a little damage is OK, but over-tightening the screws can cause them to break. Unscrew the Water ValveOnce the retaining screws are removed, unscrew the water valve from the pipe. When installing your new faucet replacement, be careful not to damage it in any way. Remove the Old FaucetOnce the water valve is free, it can be removed easily. Just twist it off of the pipe and then remove it from your deck or patio area. Install the New FaucetBy using the same screws that were used to remove the old sillcock outdoor faucet, you can screw in the new frost-free sillcock. Be sure to tighten them evenly – over-tightening can cause damage. Test the FaucetAfter the new faucet is installed, test it to make sure that it works correctly. Push the spray arm all the way out and then pull it back in to start the flow. Check to see if water comes out of both sides of the valve – if not, there may be a problem with your installation and you will need to take it down and re-install everything correctly. Enjoy Your New Frost-Free Sillcock Outdoor FaucetEnjoy the great weather outdoors - without worrying about frozen water pipes, now that your frost-free sillcock outdoor faucet has been installed. Conclusion:If you are looking for an easy way to remove your old frost-free sillcock outdoor faucet with a new and improved model, follow these simple steps. Be sure to test the new faucet before using it in case there are any issues, and then clean up the area around it once installation is complete.
0 Comments
If you're looking for an affordable and easy way to add a touch of elegance to your outdoor space, frost-free sillcock faucet is the perfect option. This versatile fixture can be used to fill any water needs you have, including watering plants, filling pots and pans, and satisfying thirst during hot summer days. Here are a few simple steps to installing a frost-free sillcock outside faucet. A Step-By-Step Guide to Installing a Frost Free Sillcock Outdoor Faucet Things Needed:
Here are some hints on how to install a frost free sillcock outdoor faucet: Step1: Removing the Old PipeIf you have an outdoor faucet that uses a traditional hose, first remove the old pipe. Depending on the model of your faucet, this may be as easy as unscrewing the handle and removing the pipe. If your faucet has a sillcock or rotatable spout, it will likely use screws to attach it to the wall. Step2: Connecting New PipingNext, connect new piping from your frost-free sillcock outside faucet to where you would like it installed (either above ground or inside). Use either a tapping tool or screw driver to screw the sillcock into the wall. Make sure that you are using the right bits for your drill/driver; if in doubt, consult a homeowner's manual. Step3: Installing the FaucetYour frost free sillcock outdoor faucet can be installed once the new piping has been connected. First use a cordless drill/driver with appropriate bits to make holes in the wall where you want the spout on your fixture installed. Be sure to pre-drill these holes first if necessary; this will ensure that your newly purchased frost-free sillcock is secure and water won't start flowing out before you're ready. Step4: Fixing a New FaucetIf you are replacing an existing faucet, be sure to measure the length of the old piping and match it up to the new frost-free sillcock before screwing it in place. If your old faucet doesn't have a sillcock or rotatable spout, just secure it with screws into the wall. Once your fixtures are in place, use pipe thread sealant or epoxy to fill any gaps and make sure everything is properly sealed. Step5: Reinstalling New HoseNow screws in place, it's time to reinstall your new frost-free hose. First thread the end of the hose through one of the screw holes on your spout and tighten using a screwdriver. Next, pull the hose through the screwhole on your bib and tighten it with a wrench. Be sure that both ends are tightly screwed in - leaks can start happening at any moment. Finally, turn on the faucet using your cordless drill/driver and enjoy refreshing water at your fingertips. Conclusion:Installing a frost-free sillcock outdoor faucet is a great way to add beauty and elegance to your outdoor space. The simple steps provided in this article will make it easy for you to install your own frost free sillcock outdoor faucet. So get started today and enjoy the perfect summer day.
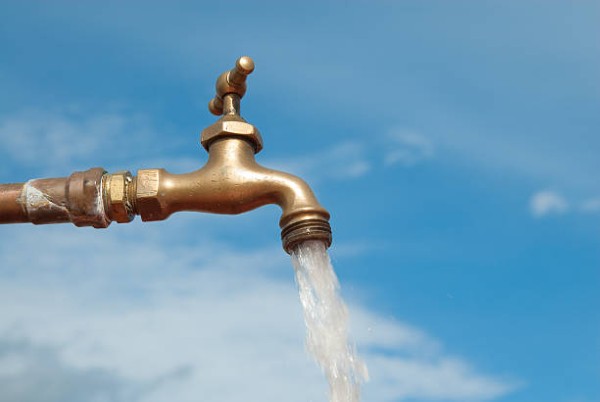
When it comes to keeping your house in top condition, one of the most important things you can do is keep your outdoor faucet spick and span. This fixture supplies water to your garden or lawn, and if it's not working properly, water will drip onto the ground and make a mess. Using the following steps, you will be able to repair a leaky frost free sillcock outside faucet. Check out Plumbing Blog to learn more about plumbing. 5 Steps to Fixing a Leaky Frost Free Sillcock Outdoor FaucetThe following steps can be taken to fix a leaking frost free sillcock outside faucet: 1. Take the Leaky Frost Free Sillcock off the FaucetIf the sillcock on your frost free outdoor faucet is defective, you will first need to take it off of the faucet. This can be done by removing a few screws that attach the sillcock to spray head. Once it's removed, use a hacksaw or knife to remove the damaged seal (if there is one) and clean up any debris that has accumulated inside the hole. 2. Replace the Frost-Free Sillcock outside faucetOnce you have fixed the seal on your frost free sillcock and cleaned up any debris, you can replace the sillcock with a new one. This part is typically easy to install - just screw it onto the spout or spray head and tighten down the screws. Make sure to check the seal once it's in place and make any necessary adjustments. 3. Checking If the Frost-Free Sillcock Is Seated ProperlyNow that the sillcock has been replaced, you should check to see if it's properly seated in the faucet housing. To do this, turn on the water and then press down on the sillcock until water start flowing from the spray head or spout. If everything is working correctly, you will hear a “snap” when the sillcock goes into place - indicating that it's sealed against water leakage. 4. Height Adjustment of Frost Free SillcockIf the water is spilling over the top of the frost free sillcock, you may need to adjust its height. To do this, loosen one or both of the screws that hold it in place and lift it up until the water stops spilling over. Make sure to tighten down the screws once you've made your adjustment. 5. Correctly Tightening Connectors on a Frost-Free Sillcock Outdoor Faucet SystemOne common problem with frost-free sillcock outdoor faucet systems is that they leak water. To prevent this, make sure to properly tighten connectors when installing them. First, line up the connector's locking tabs with the corresponding slots in the housing. Then use a screwdriver to snugly tighten the screws down. ConclusionHaving a leaking frost-free sillcock outdoor faucet is a very annoying problem and can be easily repaired by a competent plumber. By following the steps in this article, you'll be able to solve the issue and restore your faucet to its normal function. If you're experiencing issues with your frost free outdoor faucet, don't hesitate to give our team a call. We'll be more than happy to help! |